Step 1. Upload your assignment to TimelyGrader
Create your assignment in your D2L, then import it into TimelyGrader so the course and assignment are properly linked. This connection allows TimelyGrader to send the generated rubric back to D2L later, ensuring everything stays in sync without manual copy-paste.
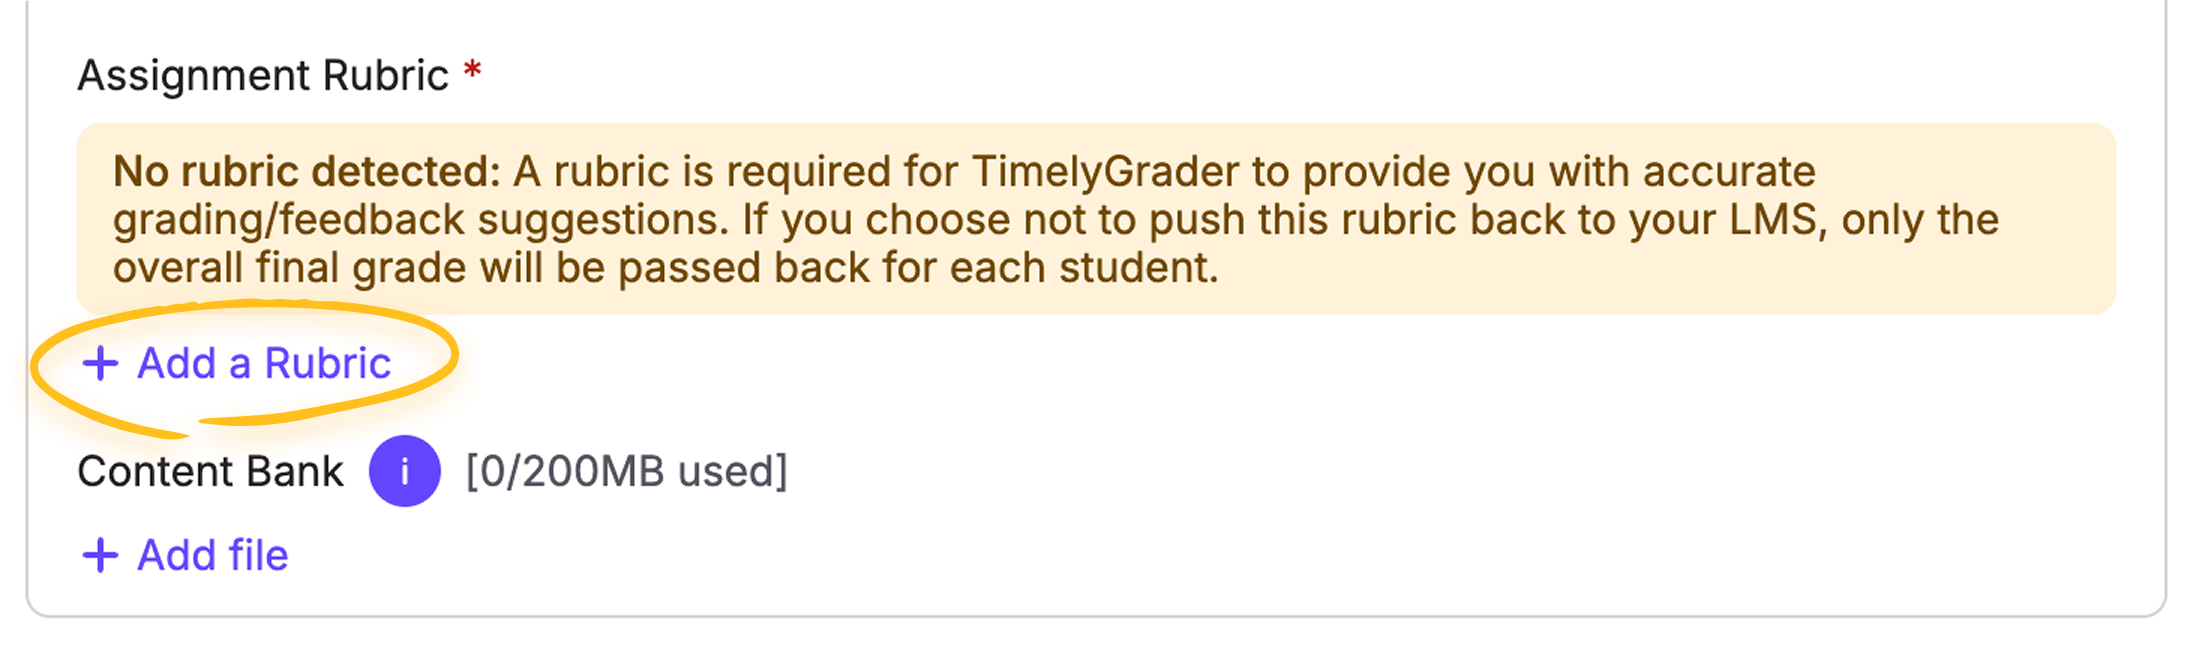
Step 2. Open the assignment and go to the Rubric section
After import, open the assignment details page and navigate to the Rubric section. This is where you’ll add or generate the rubric. You’ll see options tailored to the assignment so you can move from a blank slate to a usable rubric quickly.
Step 3. Choose criteria and scores
Decide how the rubric should be structured. You can set the number of criteria you want to evaluate, optionally name those criteria if you already have preferences (for example, Clarity, Use of Evidence, or Formatting), and assign a maximum score to each. You’ll also choose how many rating levels you want, such as three levels labeled Needs Improvement, Meets Expectations, and Exceeds Expectations. If you’re unsure about the exact criteria, you can leave them unspecified and let the AI suggest a sensible set based on the assignment type.
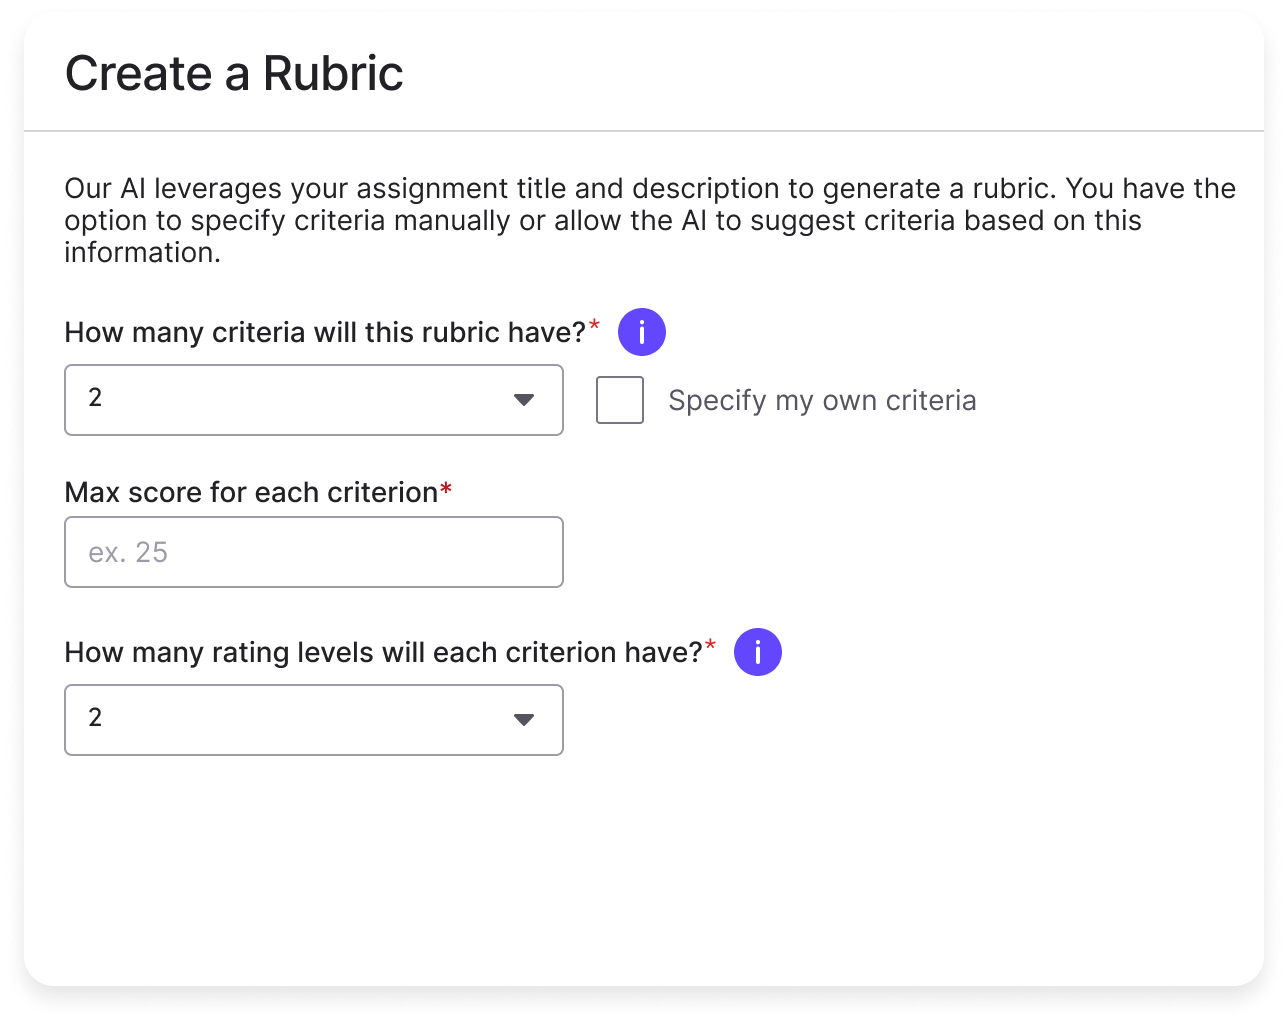
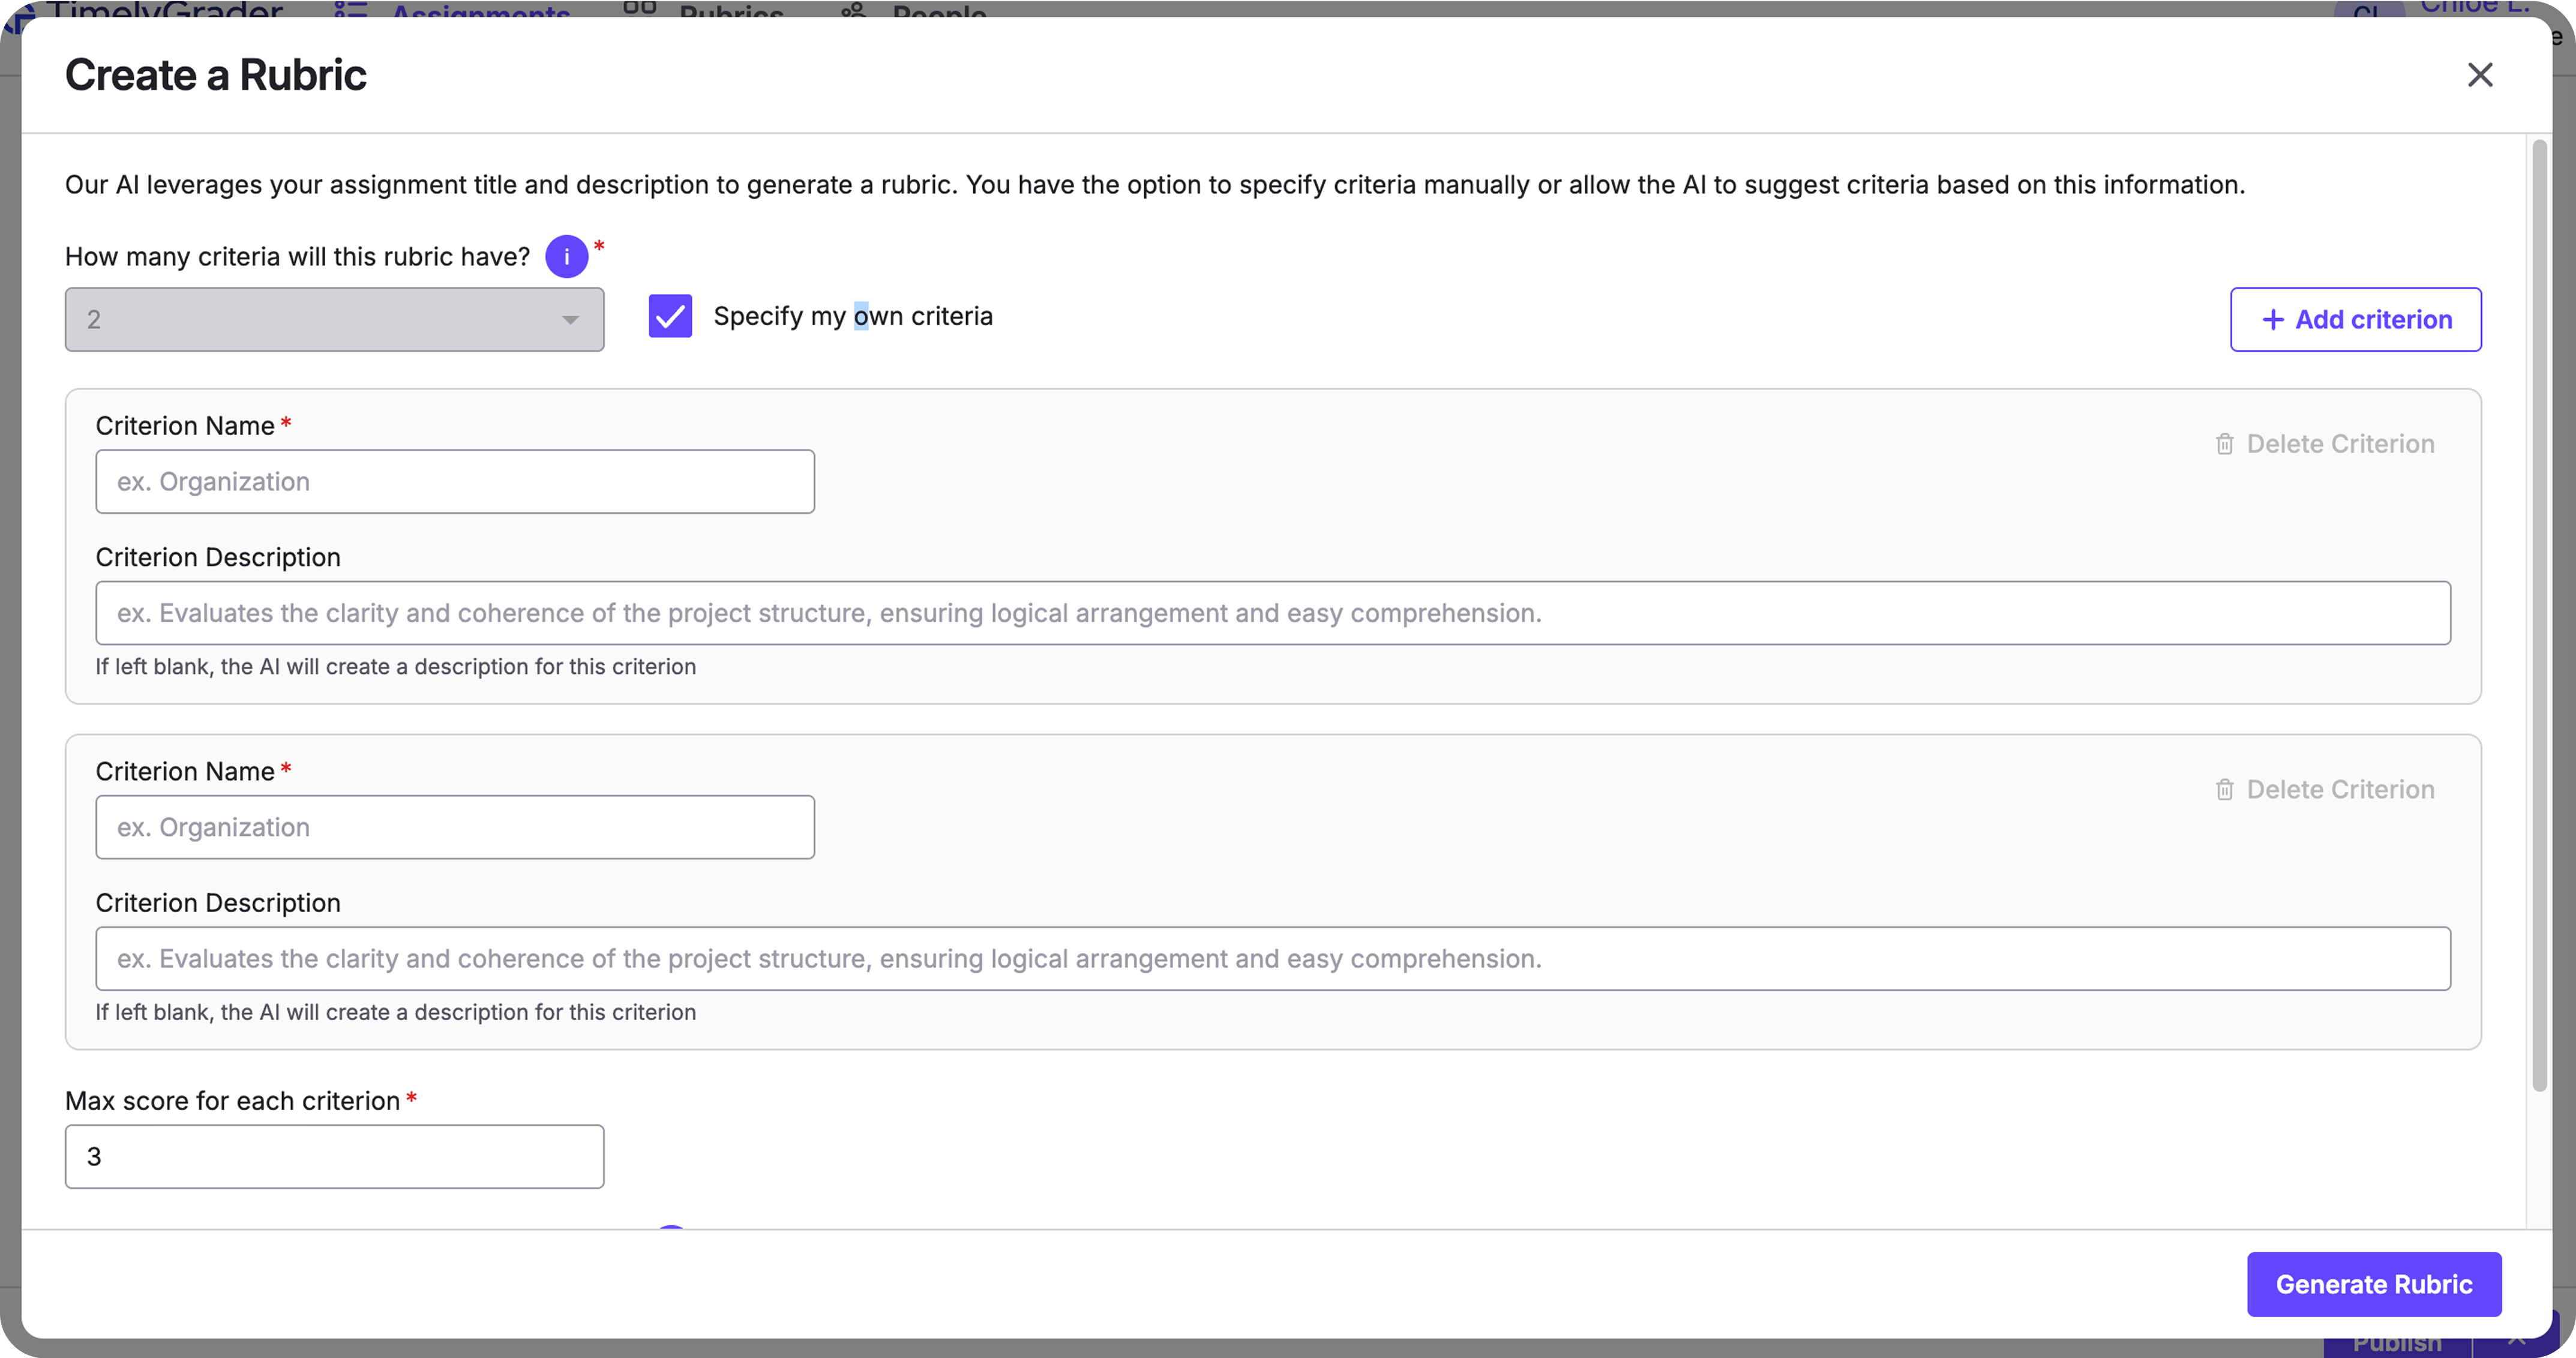
(Optional) Select “Specify my own criteria”, then use the text fields to enter criterion names and descriptions.
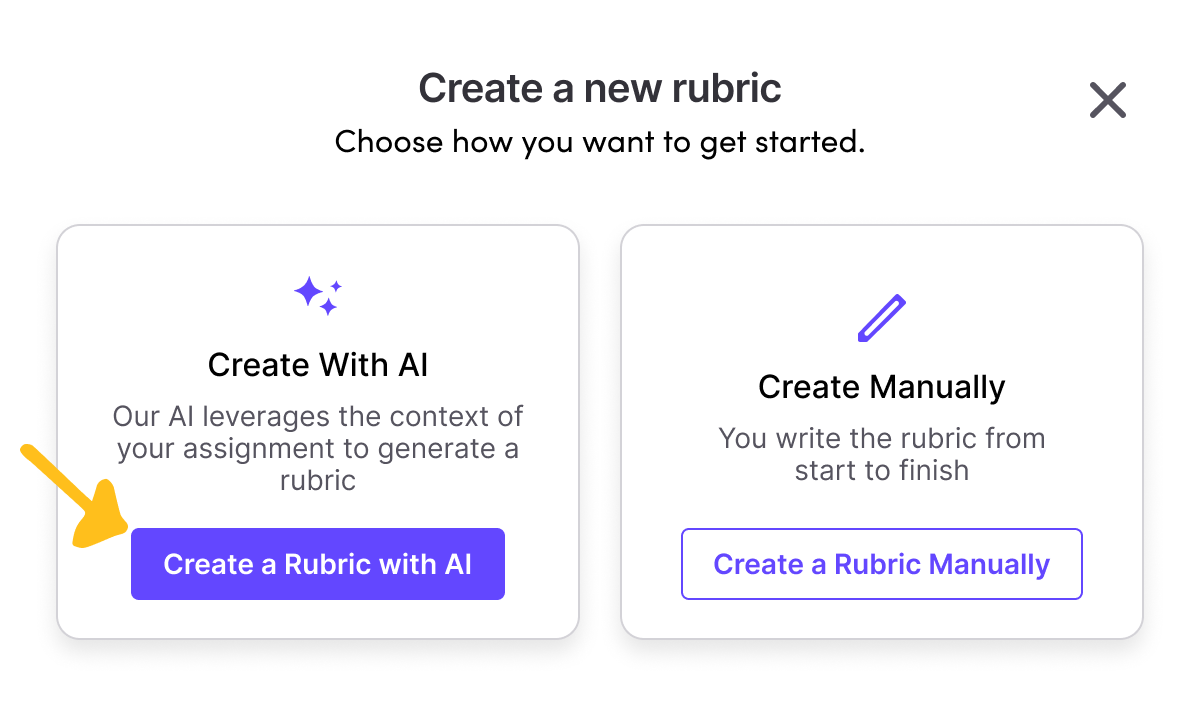
Step 4. Generate the rubric
Click Generate Rubric and let the AI do the heavy lifting. It creates criteria with point values, labels the rating levels, and writes student-friendly performance descriptors aligned with your grading style. You can continue other work while this runs; when it’s ready, the full draft appears in the Rubric section for your review.
Step 5. Review, edit, and confirm
Review the draft for accuracy, tone, and fit. You can edit any part in place, including criterion names, point weights, and descriptors. If you want a different structure or voice, adjust the criteria, scores, or descriptions and regenerate. When you’re satisfied, confirm to save the rubric, then sync it to D2L so students and TAs see the same criteria you do.
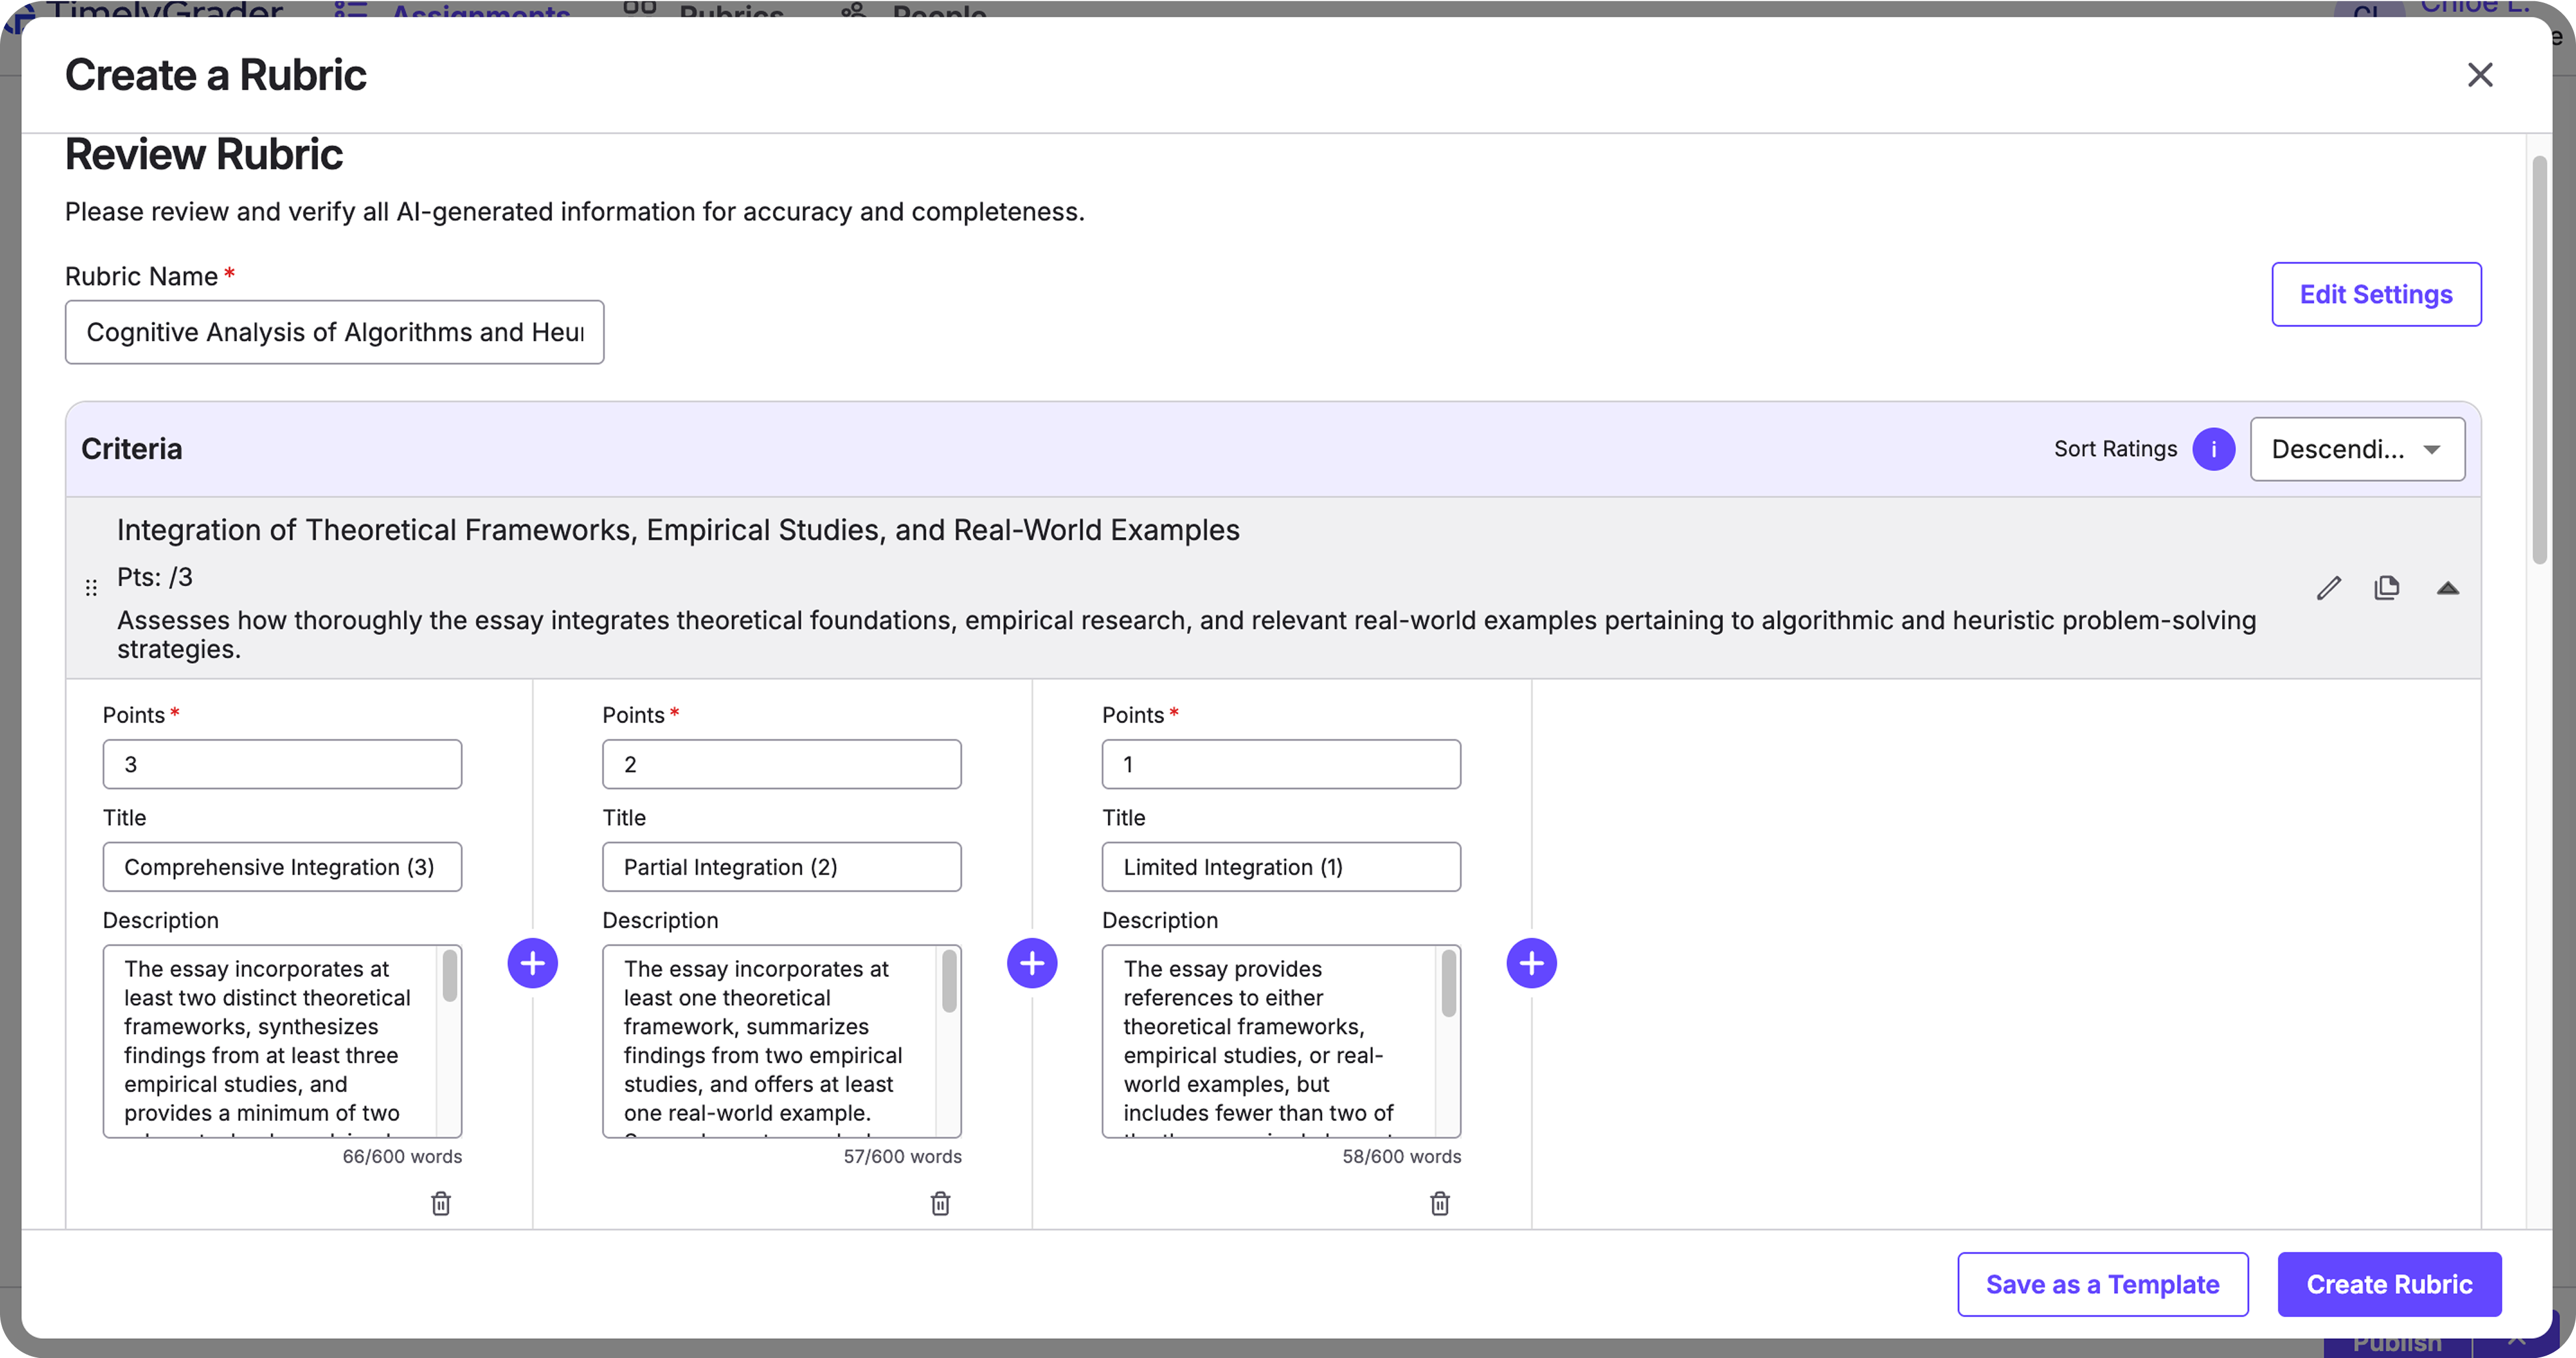
Click Create Rubric (bottom-right) when you’ve finished reviewing.
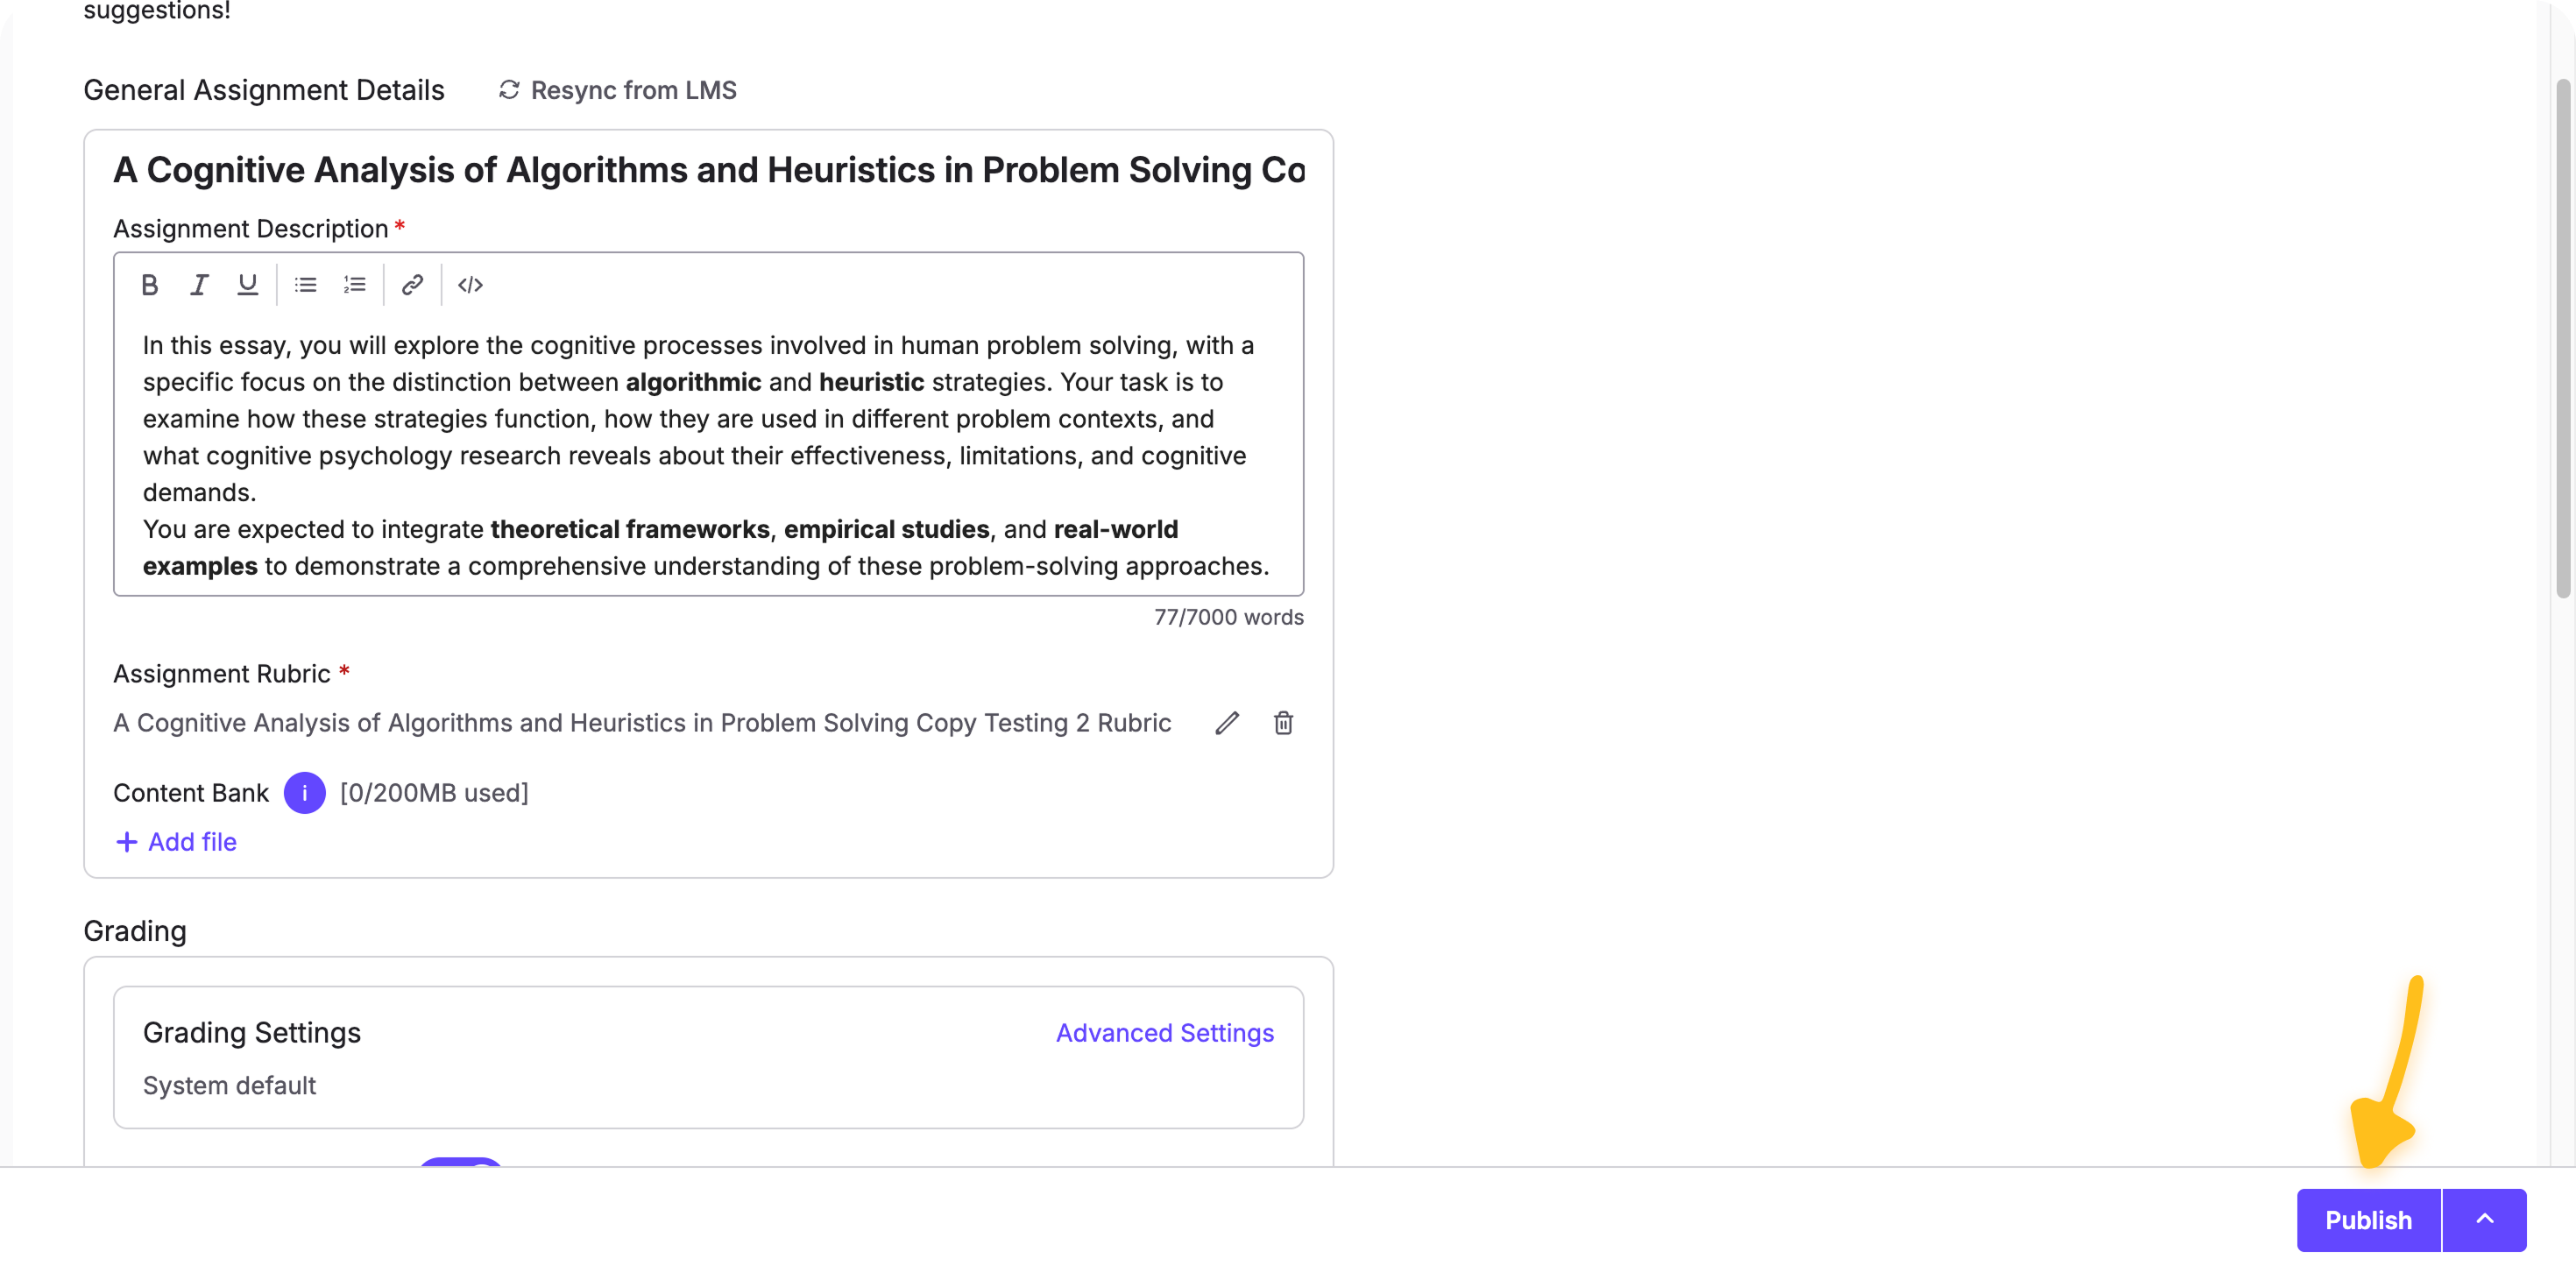
Click Publish, then confirm in the sync dialog to push your rubric to D2L.
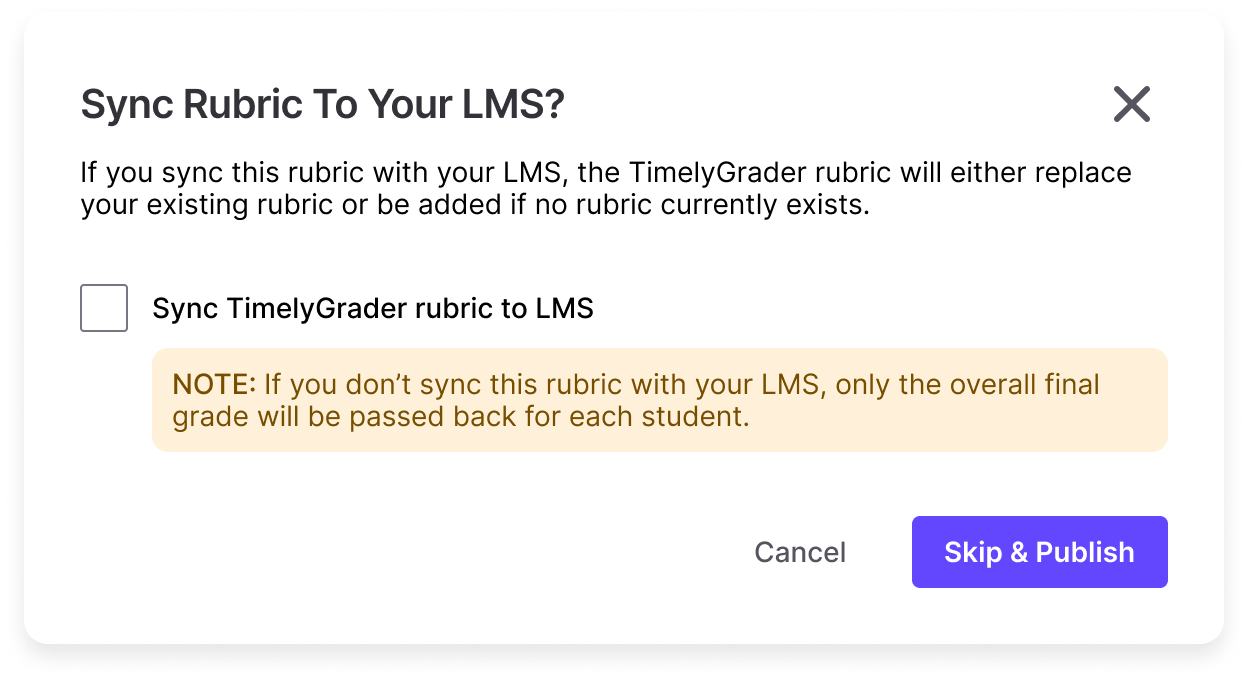
Select “Sync TimelyGrader rubric to LMS” to push the rubric
Best Practices
FAQs


