
How do you set up a video assignment so students know what to demonstrate and Hugo knows what to look for? Today we’ll walk through a real-world example to help you picture your entire assessment flow in TimelyGrader.
Let’s walk through an example: a nursing student recording how they prepare a medication vial for an injection.
There are four parts to consider: the basic assignment information you’re used to, how Hugo should analyze the video, the look-fors that describe successful performance, and the violations or omissions that need attention during assessment.
1. Adapt your assignment instructions for video
An assignment that asks students to “explain the procedure” may result in a spoken explanation without a demonstration. If you want to assess practical performance, tell students exactly what they need to show, what they need to explain, and what the recording must capture.
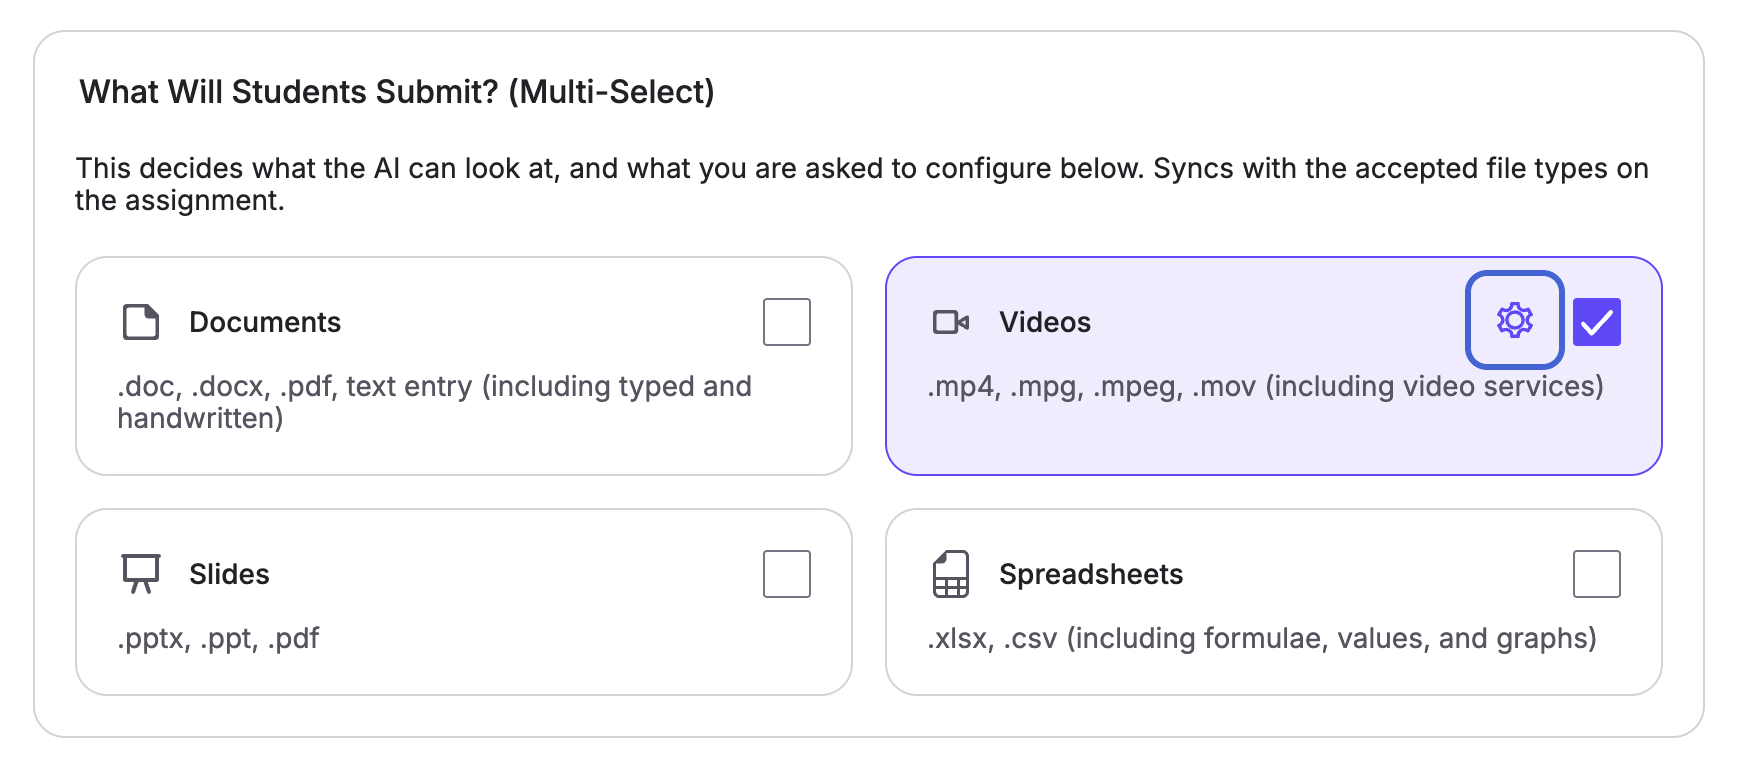
You can also specify the file types students will submit. In our example, Videos is toggled on.
For example:
“Record a video demonstrating medication-vial preparation in a simulated clinical setting, following the procedure taught in this course.
Position the camera so your hands, equipment, and work surface remain visible. Ensure relevant labels can be read when you refer to them.
Demonstrate each required step and explain the purpose of key actions as you perform them. Include your checks of the medication label, expiry date, and vial condition, and demonstrate the preparation and aseptic practices required by our course protocol.
Use simulation materials and do not include patients or identifiable patient information.”
These instructions give students a clearer recording task. They also give Hugo context for evaluating the submission.
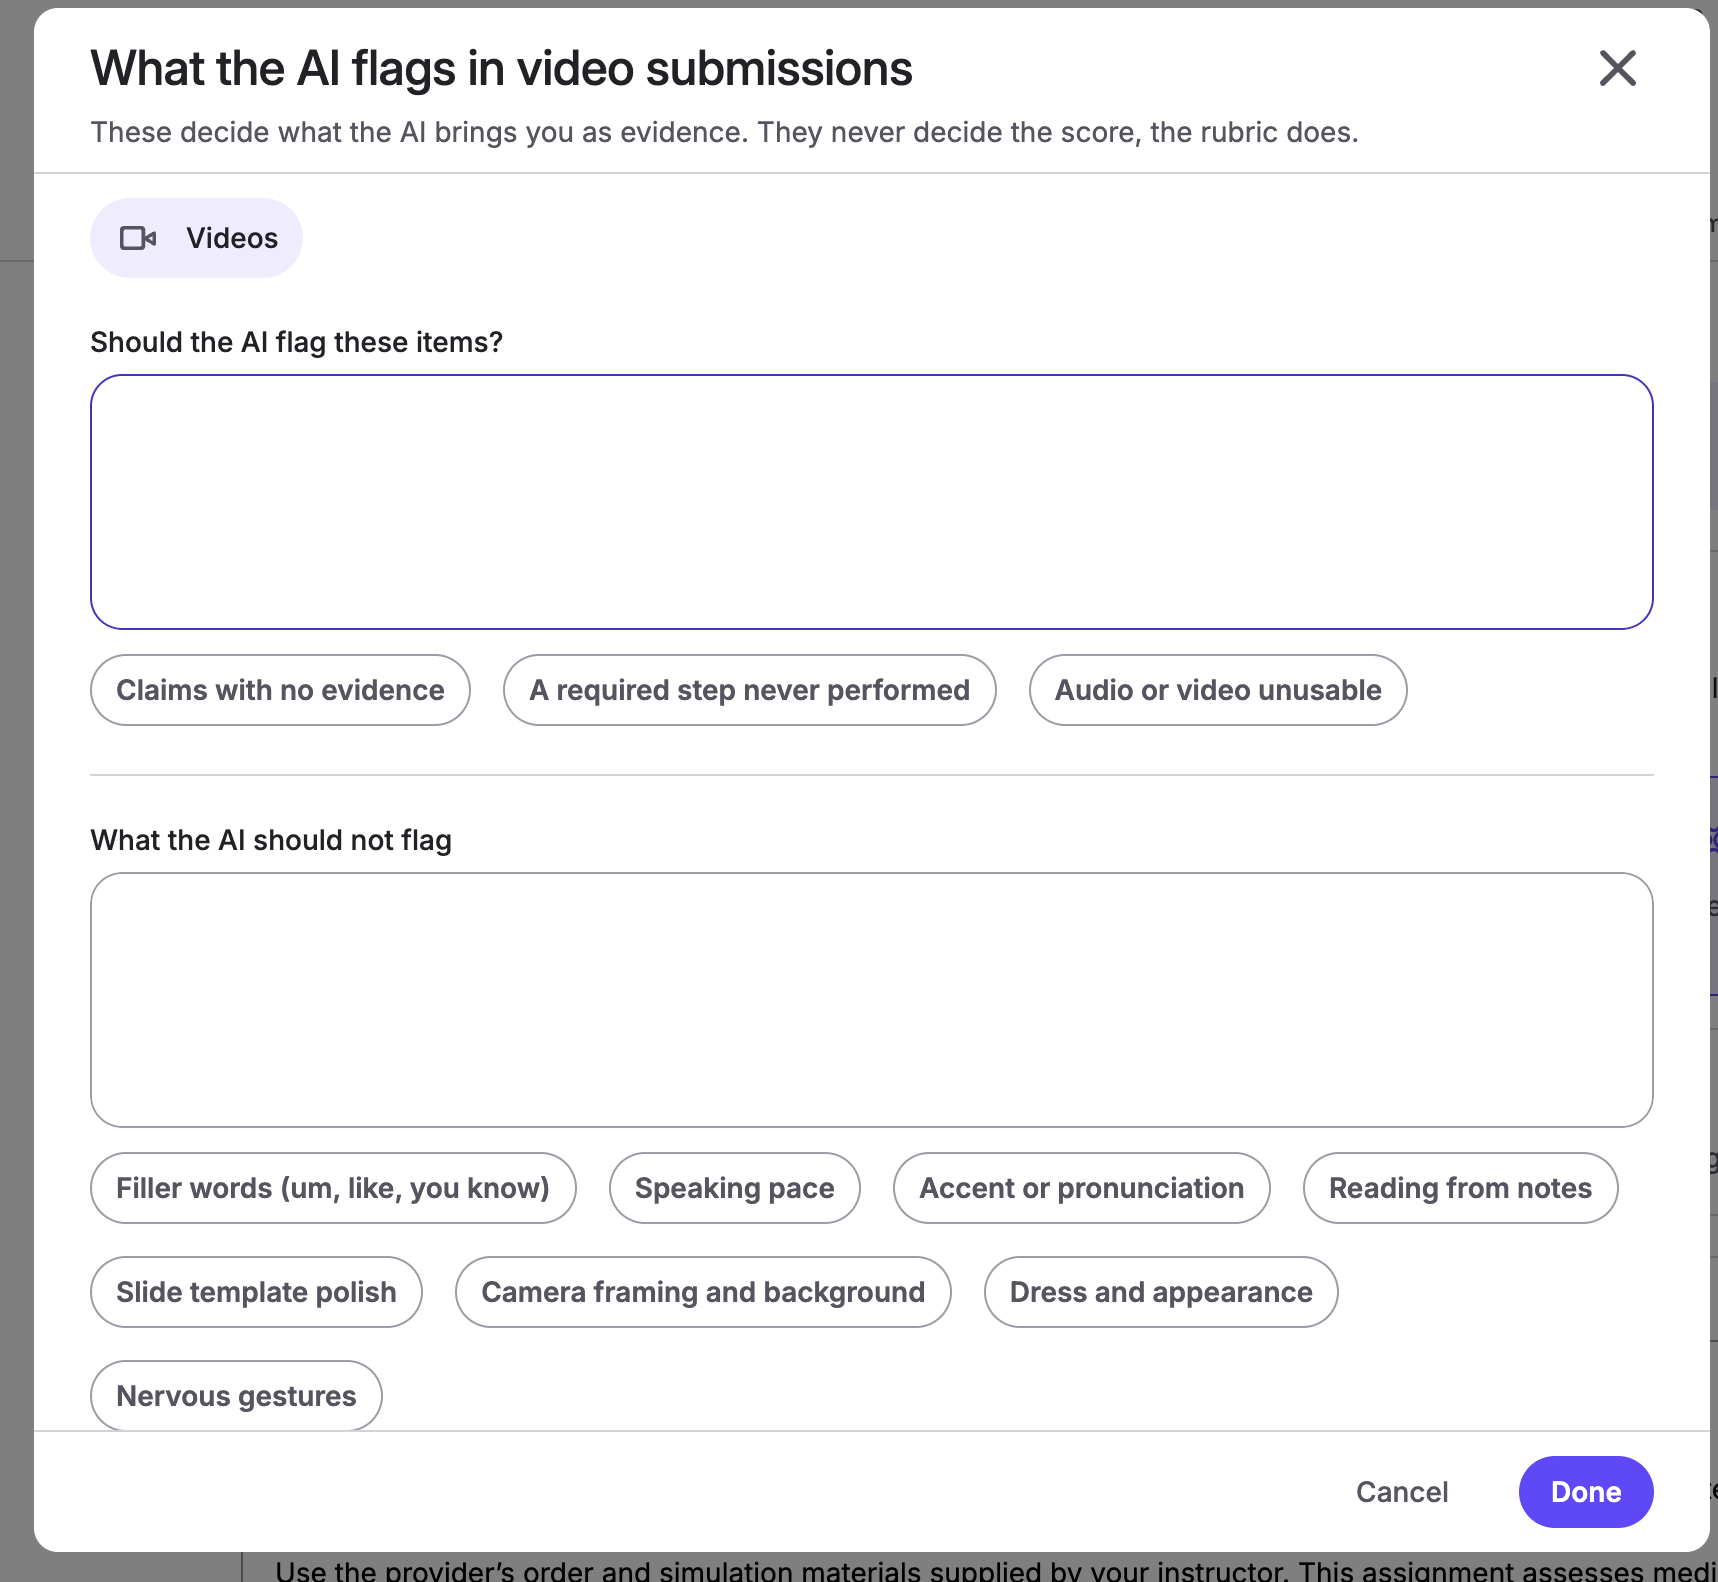
If parts of the video aren’t relevant to the assessment, such as its length, click the gear icon to add that to the instructions. There you can tell Hugo what to flag and what not to flag.
2. Add look-fors to each rubric criterion
Your rubric defines what you assess. Look-fors describe the observable evidence of successful performance within each criterion.
For a criterion called “Pre-procedure checks,” you could add:
For “Preparation and aseptic technique,” you could add:
For “Clinical reasoning,” you could add:
Use one or more observable expectations per look-for. “Demonstrates competence” is broad; “Explains what they would do if the medication had expired” gives Hugo something specific to assess.

3. Define violations and omissions
Next, identify concrete errors or missing evidence that matter under each criterion.
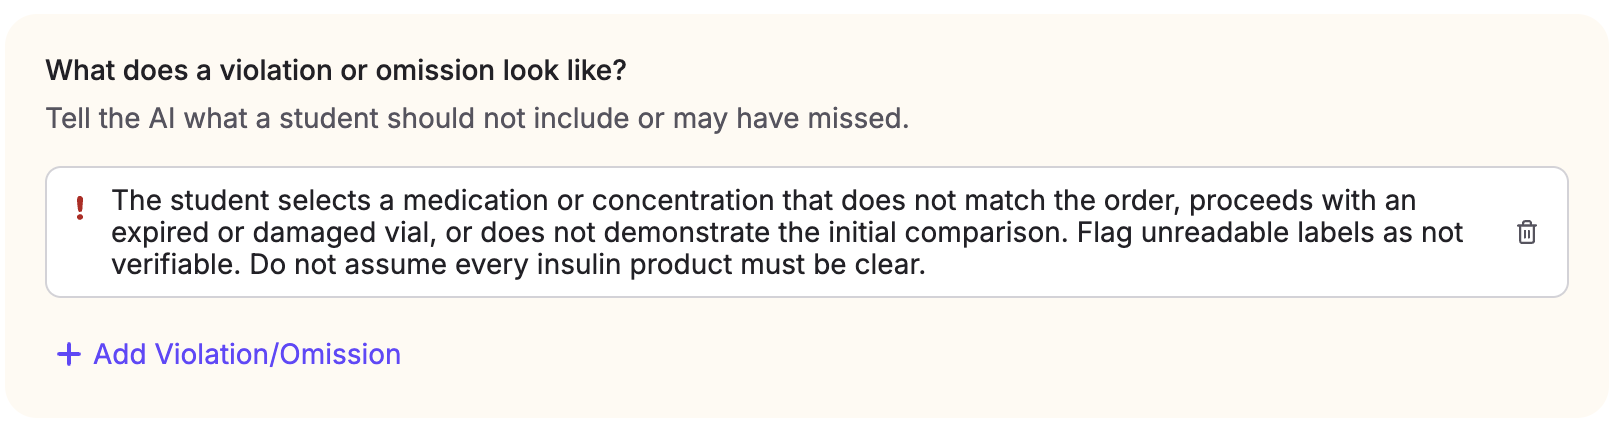
For “Pre-procedure checks,” examples might include:
For “Preparation and aseptic technique,” examples might include:
Adapt these examples to your course’s clinical protocol and rubric. If an error has a specific scoring consequence, make that consequence explicit in your grading guidance.
4. Tell Hugo how to handle unclear evidence
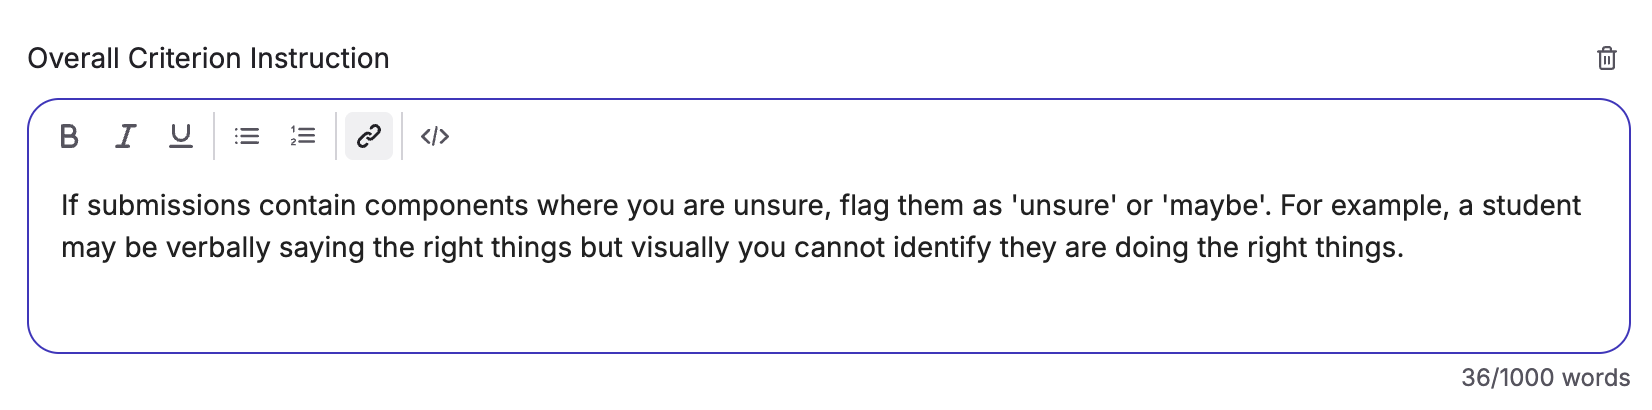
Video quality can affect what is assessable. A student’s hands may move out of frame, a label may be unreadable, or an explanation may be difficult to hear.
You can add general grading instructions such as:
“Base feedback on visible actions and audible explanations. Distinguish between an observed error, an omitted demonstration, and an action that cannot be assessed because the recording is unclear.
Do not assume a step was completed correctly when it is out of frame. Identify the evidence limitation for instructor review.
Where the rubric requires a physical demonstration, a verbal description alone does not satisfy that requirement. Assess presentation style only where the rubric explicitly includes it.”
This helps keep feedback focused on the evidence available in the recording.
5. Review, then calibrate
After processing a few submissions, compare Hugo’s feedback and grading suggestions with your own assessment. We’ve added a few things to the video grading flow to help.
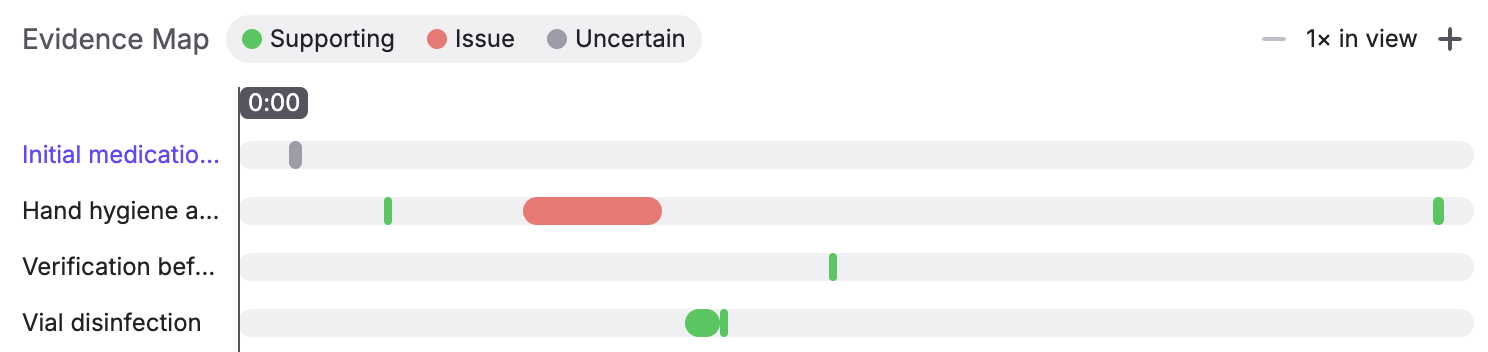
Alongside the video and transcript is the new Evidence Map. It lets you jump straight to the parts of the submission we’ve flagged as Supporting, Issue, or Uncertain evidence.
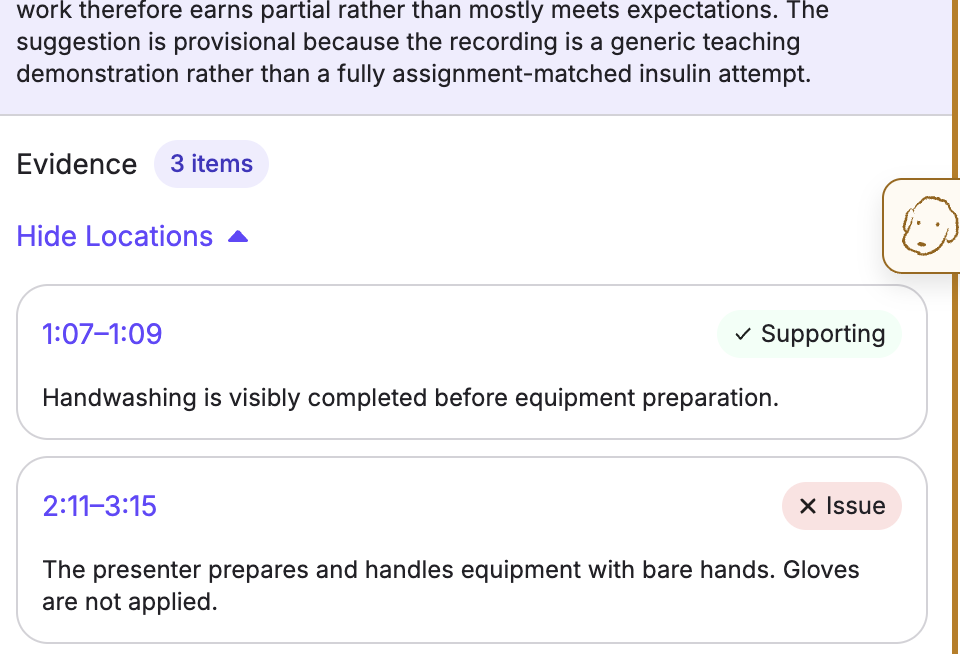
We’ve also added timestamps and evidence types to the Evidence drop-down, so it’s easy to check the rationale for bias, hallucinations, or errors.
If Hugo consistently misses an important action, add a more specific look-for. If it overlooks an error, clarify the relevant violation. If it comments on something outside the assignment’s scope, adjust your general instructions.
That brings today’s deep dive to an end! We’ve designed video grading around our core ethos: we provide suggestions, and you do the grading.
The TimelyGrader Team